
Our Chairman Noel Power gave a Queen rearing course early last June with 21 attendees who all ended up with an Apidea and Queen cell. The method Noel used is a system based on “Queen rearing Simplified by Jay Smith”. After grafting the larvae into cups the cells are started using the swarmbox method and finished on a different double brood box. Before hatching the cells are removed to prepared Apidea.
Below are some images from the course and Noels notes on some of the procedures. Also shown is a calendar for queen rearing and a video for further information.
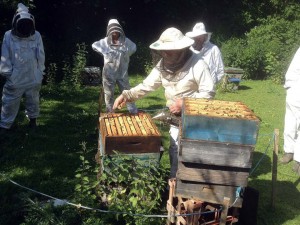
Noel demonstrating Queen Rearing

Example of a swarmbox
Starting cells in a swarm box.
Filling the Swarm Box in Jay Smiths own words, “Two combs containing some honey and pollen are placed in the swarm box. These should be old combs and not too heavy, for, in the handling they are to receive, they will be liable to break down if new or if they contain much honey. These combs are placed one at each side of the box and are held in position by the two blocks that are to support the cell bars. A funnel, such as is employed in filling pound packages is used for putting bees into the box.” Smith suggested six pounds of bees for this swarm box.
(Clive de Bruin uses bees from 6 frames. I like to shake off the older bees and use bees from about 9 frames. My guide is that when I bump the box on the ground later the bees should fill about 2” in the bottom of the box.)
The bees in the swarm box were then taken to what Smith called his “dungeon.” He says, “back in the dungeon the bees remain quiet at though it were night, away from noise, light and strong air currents, and are as contented and satisfied as though they were in their own hive.” The dungeon was his basement.
“I usually fill the box at one o’clock in the afternoon and leave the bees confined there in the basement until three o’clock. I find that two hours of confinement is all that is necessary, for, as the bees are queenless, broodless, and on strange combs, they realise their queenlessness to the fullest extent in that length of time..”
He goes on, “When all three are finished -[He is referring to the grafting process]- , they are ready to be placed in the swarm box….Now pick up the swarm box on each end. Raise it about six inches from the concrete floor and bring it down with a jar.
(A good thump on a lawn will be fine and is easier on the woodwork.) All of the bees that were hanging to the cover in a cluster will fall to the bottom in a mass. Now remove the upper cover, take up the cell bars and place the graft in the box.. Have ready a quart Mason jar, with perforated lid, filled with sugar syrup or honey, diluted with about one-fourth water, set the swarm box back into the dungeon, and the bees will do the rest.”
The next step:
The bees should remain in the swarm box until three or four o’clock of the day following. Smith uses a finishing hive to complete the job of raising the queens. Lets pick up from him, “If the work has been properly done nearly all of the cells should be accepted. One should average an acceptance of eighteen cells out of twenty and frequently all should be accepted. When the bars are taken out the larvae should have an abundance of royal jelly literally swimming in it, and the cells be drawn out into proper shape. If conditions are right all sixty are accepted.”
Noel’s comment,:- The Swarm box is similar to a five framed nuc. It features some Queen excluder that the bees are forced through to prevent a queen entering. I found this a bit of a pain so I go through the hives earlier and find and cage the queens. I have even done it the day before when I was doing it publicly then there is no embarrassing moment when you cannot find the queen. You can use the funnel arrangement he has but an inverted traffic cone will do the job fine.
The important thing is the box is made to hold ( for me 5 frames) and should be 2 to 3 inches deeper than the frames. This bottom area should be well ventilated with wire mesh as the bees will be closed in and not able to fly.
I also fix two pieces of wood to the box floor under the frame side bars as on one occasion when I bumped the box on the ground the honey frames came away from the top bar, so now the side bars are also supported from underneath.
The frames that carry the grafts I make about ¾” wide. That way the bees don’t build so much brace comb and the cells are not entombed with it.
The box is made up with a frame of unsealed honey, a space for the graft frame, a frame of pollen (important as young bees feeding larvae need pollen) another space for a graft and then another frame of unsealed honey.
I make up the swarm box in the morning about 11 am and it is then closed up and put in a cool dark place. I put in the grafts about 3 in the afternoon which gives me time for my lunch and to do the grafting.
The frame from which the larvae were grafted has a black plastic foundation which makes it easier to see the required size larvae. After some practice runs by the course attendees the cells are primed with royal jelly and larvae grafted on to it. The grafted frames are placed in the prepared swarmbox and checked the following day for acceptance.
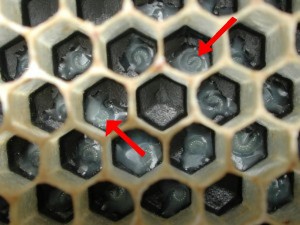
Larvae to be grafted
The frames are moved to a double brood box colony with the queen below a queen excluder and some open brood in the top chamber where the frame of grafts are placed. Therefore the cells are started in queenless colonies but nourished in queen right colonies.
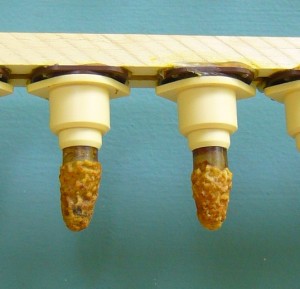
Queen cells
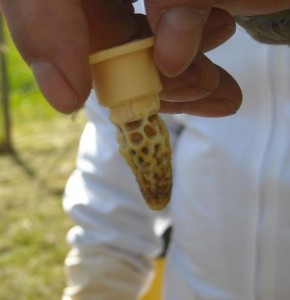
Queen cell ready for Apidea
Apidea were filled with a cup full of bees, fed and kept in the dark for 2 days before receiving the sealed queen cells which were a day or two away from hatching.
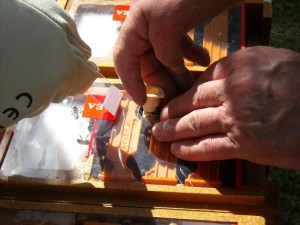
Queen cell into Apidea that has a cup full of bees

Queen Rearing Schedule
This is a YouTube video by Lucian Dumitru and some more can be found here.
Leave a Reply